Order in the next
00h 00m 00s
and your order leaves TODAY!


Hints and Tips No. 1 Batteries!!
Of all the calls we get from customers, perhaps the most urgent is for more batteries. Whether it is your bark collar, containment system or remote training collar, having specialized batteries go flat without spares is very frustrating! You can guarantee that when it is a hard to get battery, it will always go flat late on a Friday afternoon as well!! Next time if your training collar uses a specialised battery, always ensure that after you insert your last battery, order your next one(s). This is the only way to guarantee your dog will never catch you and the e-collar short again!!
Hints and Tips No. 2 Using a Remote Dog Training Collar around the Home.
A remote training collars for dogs is an excellent way to fix common problems like scratching on the door, tearing washing off the line or digging holes for example. However, for the dog to learn that a behaviour is unwanted, timing and consistency are vital. If you are constantly misplacing your remote device or are getting distracted easily and missing your dog doing the things that you want to fix with the ecollar, remember these tips:
- Most dog training collars come with a lanyard. When training hang the remote around your neck or place the remote where you can get quick access to it.
- Remove your distractions. Target remote training times when you are not distracted by kids or other things.
- Try not to let the dog have access to the behaviour when you are not ready to use the remote dog training collar. If you cannot be ready to train the dog, do not hang the washing out!
This advice applies to both spray remote collars and electric remote dog training collars!
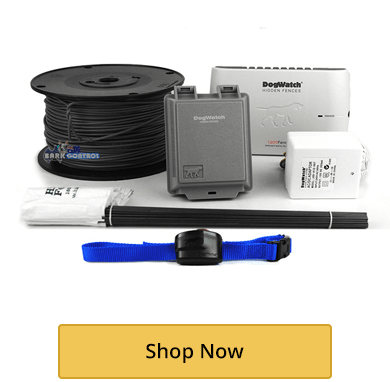
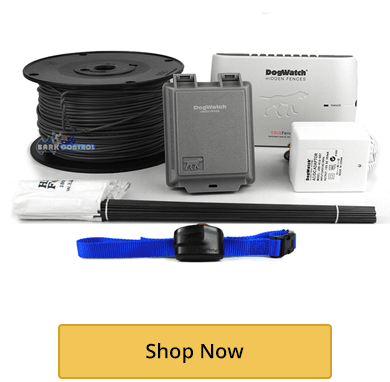
Hints and Tips No. 3 Assistance with Planning out the Installation of your Dog Containment System
For those that have no experience with electric dog fences, working out how to install the containment system can be a little daunting. Especially when it comes to the stage of planning out where the boundary wire goes and how to get it back to the transmitter to make a continuous loop.
Rest assured help is only a phone call or email away. We regularly get customers to send in 'mud maps', plans of their house and boundaries or we can even go to mapping websites and look down from above to get a better idea of your set up and requirements. Our staff have years of expereince to call upon to help you plan the installation of your dog fence in a way that it is as easy as possible to install and it maximises the effectiveness to keep your escaping dog from getting out your boundary in the future.
Remember when it comes to electric dog fences:
- Carefully plan your containment system installation.
- Install as per the instructions and do not take shortcuts.
- Do the training so your dog understands how the dog containment system works and understands escaping is no longer an option!
Check out our range of electric dog fences and bring an end to your escaping dog problems fast!
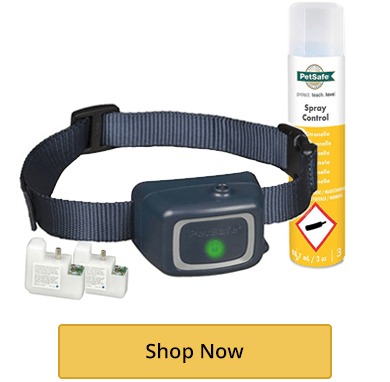
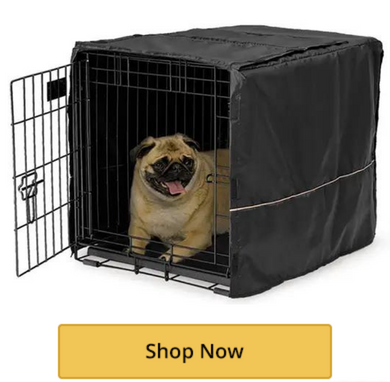
Hints and Tips No. 4 Getting Your Bark Collar Up and Running
There is nothing more frustrating than getting a new product, and then not being able to get it going in the way you expected. This can especially apply to bark collars! Particularly when you (and your neighnbours!) have been sweating on it's arrival to stop your dog barking problem.
Ninety-nine percent of all the calls or emails we get from customers who cannot get their bark collar going are fitting related. That's right! There is rarely any problem with the bark collar itself or the fact the collar is not suitable for the dog. The main issue is that the collar has not been placed on the dog properly.
All static electric bark collars and spray bark collars that are vibration activated require the collar to be fitted on the dogs neck in an appropriate way that the barking can be detected and in the case of electric collars, give the correction to the dog. This time of year with many dogs having a thicker undercoat to get through the cold of winter can make it a little harder than when the weather is warmer.
For more information on how to fit bark collars properly please read my article on, How to Fit a Bark Collar Properly
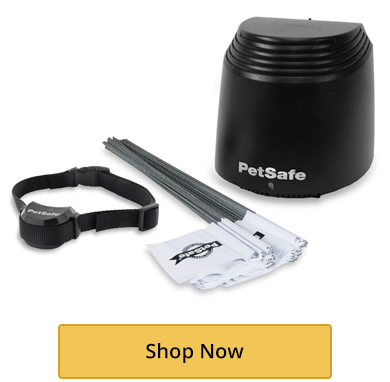
Hints and Tips No. 5 Static Collar Maintenance
There are a couple of important things that all collar owners should do to get the best life out of there products. I am referring to all collar users in this case whether it be bark collars, containment system collars or remote training collars. Some regular and simple checks can and will save you money over time. Here's a few simple tips:
- Regularly check the state of plastic clips and buckles on your collar strap. Damaged clips and buckles can mean the difference between your dog going out with his containment collar on and then coming back without it, or worse still getting out of your block. If you live on a large property, good luck finding it too!
- Regularly check the quality of the strap material. If you bark collar has a nylon strap and it is becoming frayed or stitching is coming undone contact us to get a replacement before it is too late. Many dogs have taken great pleasure in chewing their collar to bits once it has come loose!!
- Regularly check that the metal probes on any collar are tightened adequately. Many electric collars are secured to the strap by the probes and washers. We recommend hand tightening and then one slight turn with a small spanner etc. Always be careful to not over tighten and damage the thread. Not checking the tightness of the probes is a very common reason for lost collars.
- Regularly check the tightness of batteries battery covers and screws. Water and electronics generally do not mix! All things work their way loose over time. A general check will help keep your collar intact.
If you have any other concerns about your collar please do not hesitate to contact us.
Hints and Tips No. 6 Rechargeable Batteries Vs Replaceable Batteries
With modern electronic dog training products you have the choice of collars that are either replaceable or rechargeable. For many it comes down to personal preference. From experience I know most people like the idea of a rechargeable collars. However be warned there are some good arguments for the good old disposables.
I also know that most people use their electric dog fence systems primarily when they go out. Unfortunately this is often when you notice the low battery warning on the collar for the first time. Don't forget many rechargeable collars have NMh batteries which can take up to 10hrs to charge! That's when it would have been handy to be able to throw a disposable battery in the collar and let your day out proceed stress free.
Another thing to consider is many rechargeable collars are not replaceable as the collars are sealed units to keep them waterproof. This means they are effectively throw away units at this time. In saying that most rechargeable collars still have a long life if looked after and maintained as per instructions. SportDog Remote Trainers and DT Systems Remote Training Collars are both rechargeable and replaceable!
So while replaceable batteries may not seem as attractive on face value, they certainly can have their benefits and should not be dismissed as an option when selecting any type of training collar.
Hints and Tips No. 7 Why are the Training Flags so Important that come with my Dog Containment System?
A lot of people wonder why they need to stick all the flags in the ground that come with there dog containment system. I know it means a bit of bending over and it can be a bit of a pain if the ground is a bit hard. However it is an extremeley important part of the training process with all dog fence systems.
The idea of the flags is to give the dog a visual point of reference to go along with the audible warning tone that it receives before getting the physical correction from the containment collar. Simply put, the dog associates going past the flags and the audible tone with getting the correction. This association is the cornerstone of all training with electronic dog fences.
As time goes by you slowly take out your training flags. That's right they are not there forever! By this time the dog will know the correction zone and the audible warning tone will be as much assistance as the dog needs to avoid the no go zones you have set the containment system to operate in. No more escaping dog!!
Hints and Tips No. 8 Who Needs a Bark Collar with 'Perfect Bark Technology'?
Some barking collars have a feature called 'Perfect Bark Technology', but what is it? Simply they are the group of static electric collars that require the sound of the barking dog plus the vibration on the neck that results from barking.
So who needs this extra feature in a bark collar? All electric barking collars for dogs that do not have perfect bark technology are vibration only. Now this is fine and safe for your dog in most cases. Howver the most common cause of accidental corrections by the bark collar is when another collar is worn and that collar rubs against the bark collar causing the vibration.
So if you have a dog tied to a run, or the back of a truck or walk the dog on lead with the anti bark collar being worn you need Perfect Bark 'Technology'. In this case the vibration alone is not enough to set the anti bark collar off! Look for it specified in the Static Bark Collars section.
Hints and Tips No. 9 Floods and Electric Dog Fence Transmitters
With much of the country, especially Queensland, under water at the moment, it is a timely reminder to have the transmitter for your dog containment system checked by an authorised electrical technician if you have suffered any water damage.
As is the case for all electrical appliances, including the transmitters for all dog fencing systems, water damage can make them extremeley dangerous.
If you need to replace your transmitter due to flood/water damage please contact us and we can have one dispatched immediately for you. Please note you do not have to buy the whole dog fence system again!
Hints and Tips No. 10 How Deep Should I Bury the Wire with my Electric Dog Fence?
With all electric dog fences you have the option of burying the wire under the ground. A very common question is, how deep? The idea with any dog containment system is to get the wire out of the way to minimise any chance of damaging the wire. So if we are going underground, we want to avoid lawn mowers, garden edgers and brush cutters for example. I normally suggest getting the wire under the grass level into the soil, but only about 20mm is deep enough. If you need to go a little deeper that's fine but try not to exceed 150mm.
Remember the deeper you go, the higher you will need to adjust the field width knob on the containment system transmitter box to get through the earth. When the earth is soft you can easily accomplish this with a round nose shovel, making a slice in the earth and pushing the wire into it. Whichever way you do it just make sure you get the wire out of harms way.
Wire breaks can be a very frustrating aspect of electronic dog fencing. However it can be avoided by burying the dog fence wire properly!
Hints and Tips No. 11 Don't use your walking lead when training your dog to understand your dog fence!
When training your dog to stay inside the electric dog fence (dog containment system), use a really long lead or rope that is different to your walking lead. The longer rope/lead gives the dog the opportunity to explore the flags that come with all dog fences, independently of you.
The idea being, when you go for a walk with your dog the routine is different to that used when training your dog with the dog fence. You would not expect your dog to want to walk out the gate with you if it is done in a way that mimics the dog containment training.
Proper training enables you to keep your escaping dog safe, whilst also giving the dog the opportunity to carry out normal activities without the fear of correction from the dog fence under circumstances you have trained for.